We’re sharing all the tips, tricks & details of building a raised patio with retaining wall—along with our raised stone patio design and cost!
Do you have a sloped area in your yard that seems unusable? Or perhaps you want to avoid a deck off the back of your house and have started envisioning your own way of building a raised patio with retaining walls?
Whatever your need, you’re in the right place, my friend!
We’re big believers in the power of a raised patio! Sure, a deck could be built to try to utilize a sloped area, but we’ll take a good raised patio on a slope over a deck any day. (Why? Read our post on “The 15 Perks of Building a Raised Patio Instead of a Deck” here!)
(We also prefer the look of stone raised patios with retaining walls over the look of raised patios with retaining wall blocks, but we’ll get to that later.)
Would you like to take a slope where no one could previously sit (without tipping over), and turn that slope into seating for 10, 15, 20…or more?
Then read on!
HOW TO BUILD A RAISED PATIO WITH RETAINING WALL:
“How easy is building a raised patio?”
(& other popular questions)
Some might say decks are easier to build than a raised patio. However, depending on how it’s constructed, building a raised patio with retaining walls can be just as much work as building a deck, if not less! We’ll get into more about that below.
(You’ll also want to check out how to save serious money on your backyard!)
Today, we’ll share the story of how we got to building a raised patio with retaining wall (we actually have three raised patios, but we’ll be focusing on the main one!) along with answers to these popular questions about raised patios:
- “What did your raised patio cost?”
- “How did you build your raised stone patio?”
- “Can you tell me how to build a raised patio on a slope?”
- “Do you have photos of building a raised patio with retaining wall?”
- “How can you help me decide on the best raised patio design for my situation?”
- “What are the best raised patio ideas, designs and materials?”
- “How do you edge a raised patio?” (We have 10 different ideas to share for this one!)
➥ BONUS: I’m also going to share a secret with you about what we’d do differently now, so that you don’t make the same mistake!
BUILDING A RAISED PATIO WITH RETAINING WALL:
Our Raised Patio Area “Before”
First, the quick backstory!
When we first bought this house, the outside space may have been what first sold us on it. With an expansive backyard and massive, mature trees over 30 years old, we suspected this might be the perfect house for us and our growing family. (We love to be outside, and so a good outside space was literally the #1 item on my wish list!)
Here’s what it looked like when we first toured it:
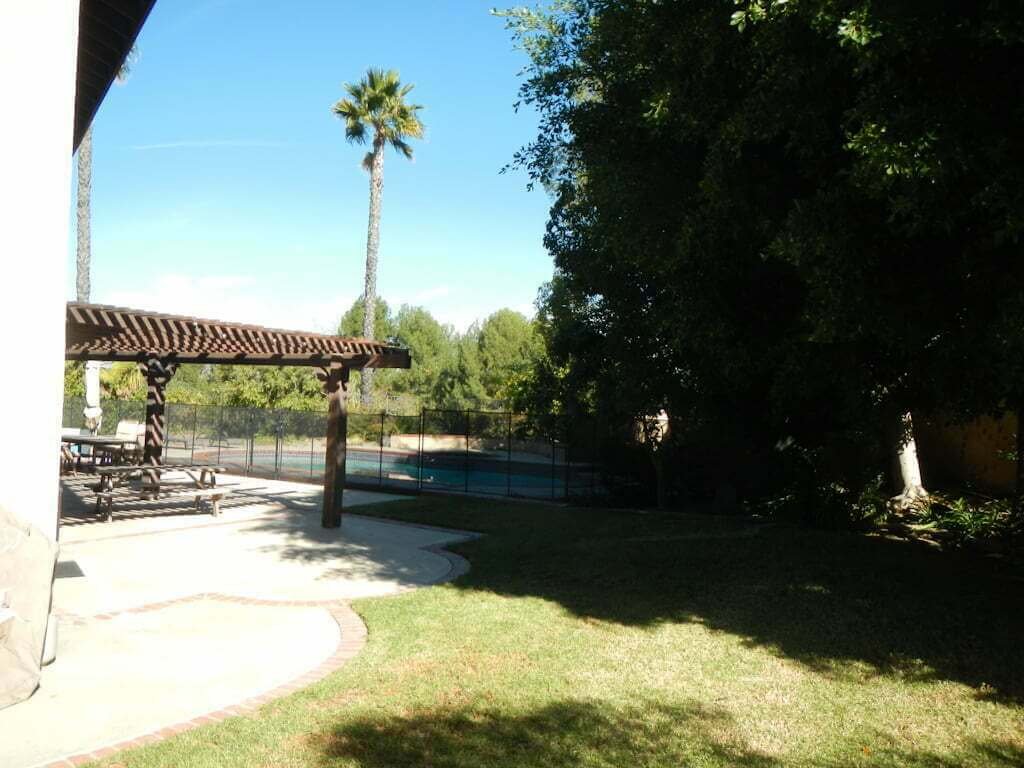
(See the full tour HERE!)
Do you see the large tree roots in the lawn? Yep, that’s where the raised patio now exists! (We first had an arborist come out to confirm that building our raised patio on this slope wouldn’t jeopardize the tree in any way.)
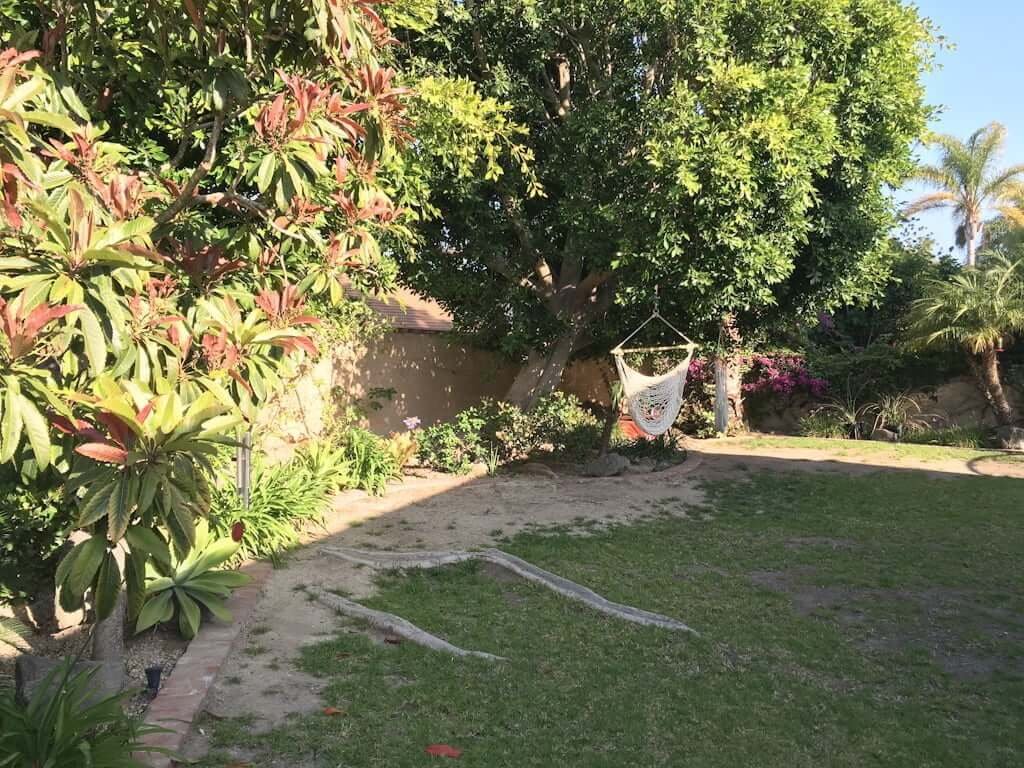
After moving in, we didn’t do much work to the backyard except adding some plants and landscaping. (Plus, we were railroaded by our surprise kitchen remodel popping up just weeks after moving in! Click here to see why we ripped out our new kitchen!)
Over the next several years of living in this house, we slowly got to know all the ins and outs of our backyard. (If you haven’t yet, take this tour of our backyard!)
It was during this “get to know you” period that I started to realize something:
One of the best views of a nearby mountain range was from a seemingly random spot on the edge of our lawn!
I discovered this one day while walking around the backyard and going through my usual “Jess process” of reimagining the space.
BUILDING A RAISED PATIO WITH RETAINING WALL:
Finding the Perfect Spot!
We already knew our backyard had a view of the mountain range in the distance. We’d even already cleared out some plants to make room for this view.
Still, when you were standing on the existing ground level, you weren’t getting the full view of the mountains that I knew had to be possible!
So…I was walking around with my first child (who was then a toddler) and trying to find the best viewpoints from around the backyard. A number of large lava rocks were scattered around the landscape, and one was in a spot where I suspected I might get a better view of the mountains because it would raise me up enough to see over the fence.
Balancing myself precariously on the top of the lava rock (those babies are dangerous if you brush up against them!), also while wearing flip flops, was not the safest idea in the world…
…but it paid off. Jackpot! I had a phenomenal view of those mountains!
➥ TIP: A home with any kind of view is not something you should leave as an afterthought. Focus on it! Highlight the heck out of it! Feature it anywhere, everywhere, and as many times as you can! This is not only for your own enjoyment, but for your home’s resale value as well.
RAISED PATIO IDEAS:
Building a Raised Patio with A View!
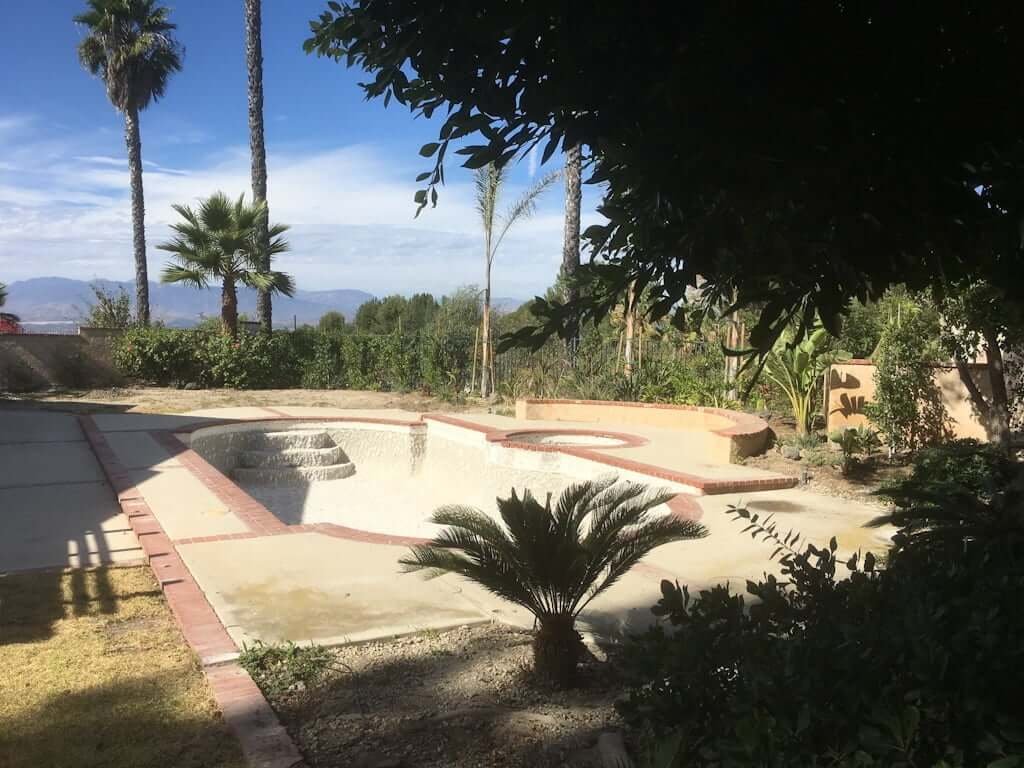
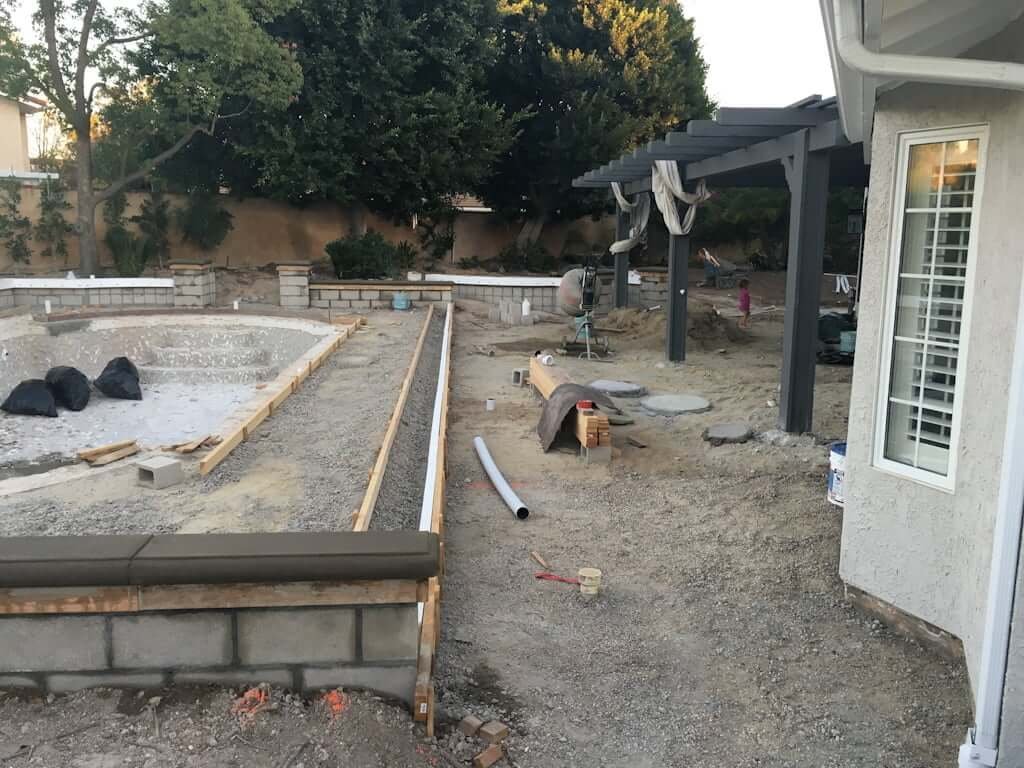
Here’s a sneak peek of our backyard (later prepared for The Apocalypse-like Event That Was Our Backyard Demo) with the mountain range in the distance. I had to stand on top of a chair to get this angle, so you can see how being a few feet higher would assist in the better mountain views we were going for!
I forgot to mention that originally, while balancing on that old lava rock, I first had to trim off several branches from the loquat tree next to it, in order to see the mountains. If you’re a tree lover like I am—don’t worry. This loquat was small and growing oddly because it had originally been planted too close to the towering ficus trees, and we’d already been told by an arborist that it would need to be removed at some point.
RAISED PATIO IDEAS:
Creating a New Space Out of Nothing
With my toddler (staring quizzically up at her mama balancing dangerously in her flip flops on this wobbly lava rock), I was filled with glee. We could see the FULL mountain range from top to bottom if this section of the yard was just raised up a foot or two!
But how?
THIS is the kind of problem I love, my friend. Reimagining. Seeing what’s not there. Creating something out of nothing.
My mind quickly started working. I began to envision how to build a raised patio with retaining wall right in the spot where I was balancing precariously on the tip of the black jagged rock. (PS: With kids around, we soon removed those quickly. In fact, we gifted them to some neighbors who were beyond thrilled to have them for their new front yard landscape! Win win!)
It’s all well and good to replace an old patio with a new one, or refinish an old pool or deck,
…but what about creating entirely new spaces?
This is where it really gets exciting!
BUILDING A RAISED PATIO WITH RETAINING WALL:
Our Raised Patio Ideas
To start compiling our raised patio ideas, we had three different things to consider.
#1: SHAPE
Many of our different raised patio ideas were in regards to the shape. We discussed whether to make our raised patio more of an oval shape, or a square, or a completely custom shape.
However, in the end we went with a perfect circle. (And I’ll share more about why I chose that design element in next week’s post!)
#2: MATERIALS
Another batch of our raised patio ideas was in regards to the surface materials we wanted to use. (Learn how to save serious money on your materials and more HERE!)
For the main flat surface, we considered pavers vs flagstone vs concrete. We planned to use this raised patio for an outdoor dining area, so we knew we wanted it to be level for the kind of furniture we’d have there.
Concrete is lower maintenance than pavers and flagstone, and we also liked that concrete would be less likely to have edges that could catch or trip anyone (as flagstone, pavers, or brick can do). I’d seen some nice concrete samples that were both stamped and colored, so we started looking into those options. I also liked that we could run lines through the concrete at 3′ or 4′ to look more like large-format tiles.
(We had considered some real stone tiles for our backyard, but with 2,000 sqare feet to cover with the pool and the rest of the backyard, it was pretty cost prohibitive! We decided we’d rather use that money elsewhere.)
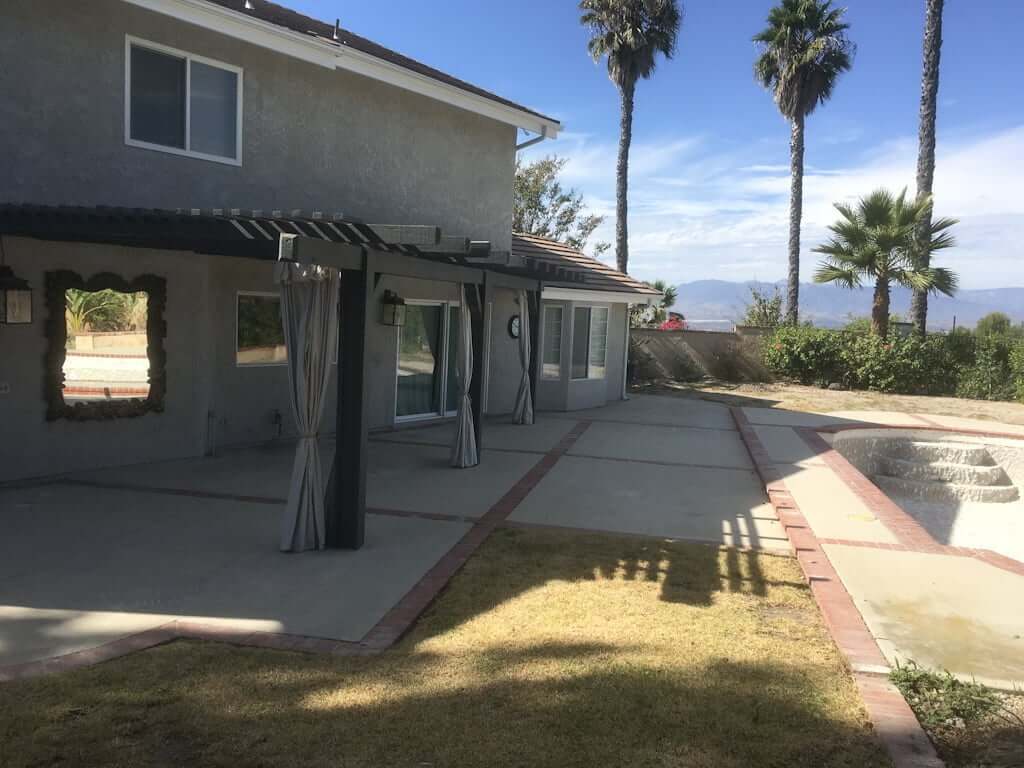
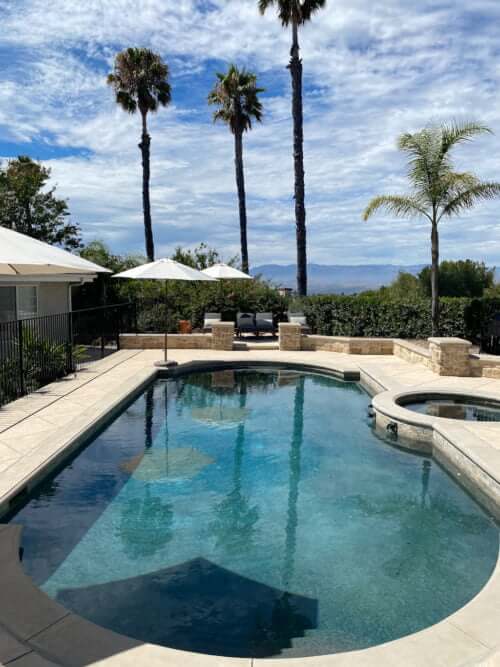
Here you can see our backyard prepared for what was coming next: Demo Day (a.k.a. “What Armageddon May Look Like!”). Most importantly, you can see that mountain view we were planning on maximizing during our backyard remodel. Here’s the view from our proposed raised patio, which we planned to make our outdoor dining patio!
The second material decision we had to make was on the raised patio’s retaining walls. Most of the walls in our southern California area are covered with stucco, so that would have been an option.
However, I’d found a stone veneer I’d fallen in love with (and it was priced right when we bought it direct!) and decided I wanted that stone veneer on all our retaining walls throughout our backyard remodel—including this raised patio with retaining wall we’d be using for our outdoor dining.
#3: DECK VS RAISED PATIO
Our third consideration was short-lived. For a time, we had considered a deck in this spot. I had originally thought it would be simpler, as well as might give more of a casual “vacation-y” vibe to the backyard.
However, we decided against a deck (because of many of our “15 Reasons to Build a Patio Instead of a Deck!”) in favor of the raised patio.
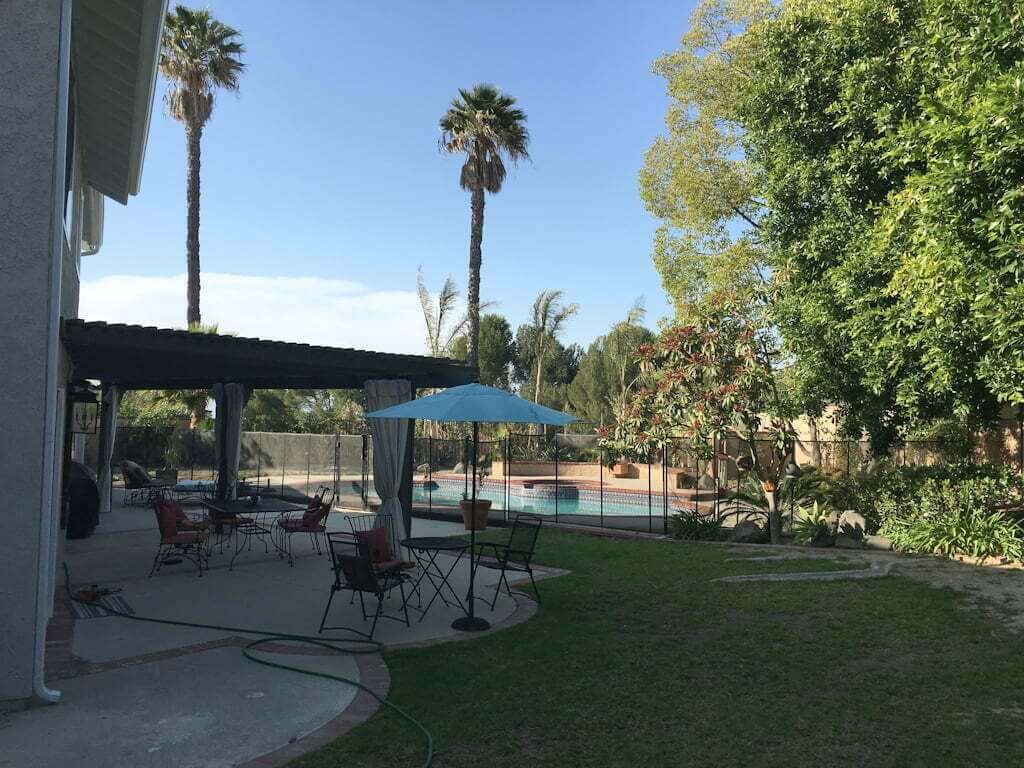
And every day I’m thankful we did! We look out at this raised stone patio from our living room, and it’s such a beautiful focal point! I would be a little disappointed every day now if we’d done a deck in such a prominent visual spot so viewable from the house.
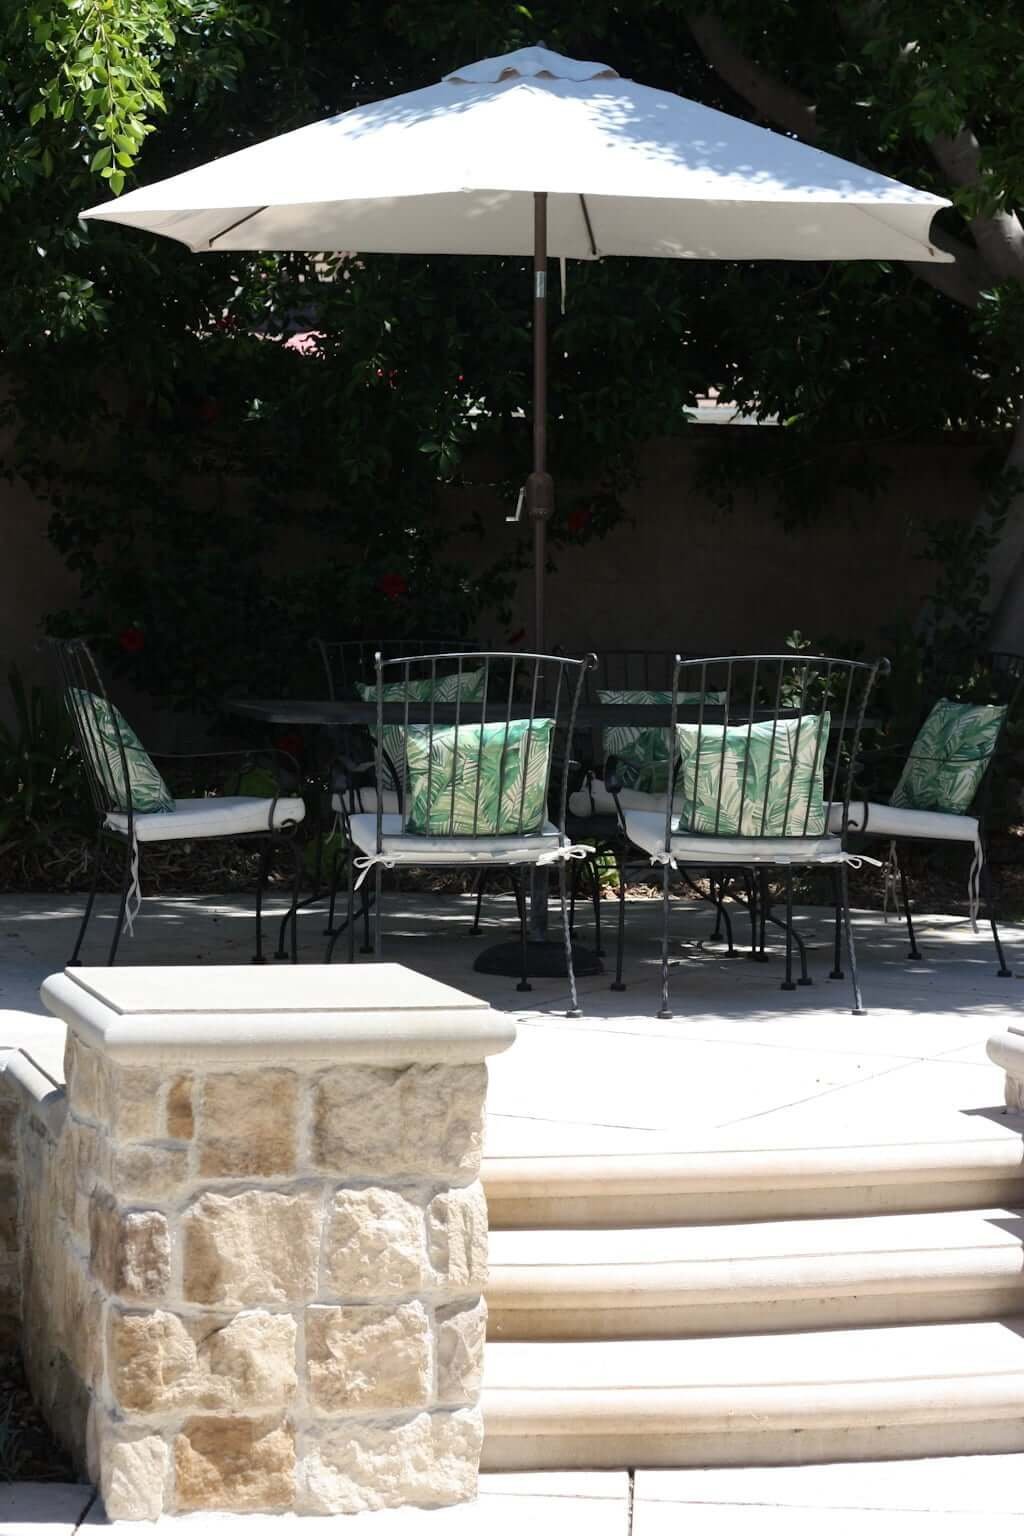
Here you can see how our raised patio on this slope is viewable directly from the inside of the house there to the right!
And here’s how the new raised patio area looks from our downstairs fireplace living room! No more lawn and tree roots, that’s fo’ sho’!
Click HERE to skip ahead to see the full “Before & Afters”, or check out all our home projects right here.
BUILDING A RAISED PATIO WITH RETAINING WALL
How to Build a Raised Patio On a Slope
There are three ways you can build a raised patio on a slope.
#1: Either you remove dirt from the back area of your slope and build a retaining wall to keep the dirt OUT of your raised patio area, or
#2: You add dirt in to raise and build up the whole level of the raised patio and build your retaining wall in the front to keep the dirt IN!
#3. The third option is rarer, but it does happen. This happens when the area you want to build your raised patio on is already level. (Such as wanting to take advantage of a view, like we did—although because ours was on a slope, we used Option #2 above.) In that case, you’d build your retaining wall all the way around, leaving room for an entry and/or steps.
First, we’d recommend that you determine the final height you want your raised patio to be, because that dictates the kind of raised patio with retaining wall you’ll build!
For more details on how to build a raised patio on a slope, read on!

HOW TO BUILD A RAISED PATIO WITH RETAINING WALL:
What To Prepare For
How do you even begin building a raised patio with retaining wall? What should you prepare for? What should you expect with building it?
Building a raised patio can be fairly straightforward but can also require some skill depending on the final materials you choose. If you’re still unsure whether you want to DIY this 100% yourself, hire some help, or a mixture of the two, it’s always good to know what to be prepared for!

Here’s an overview of what you should expect with how to build a raised patio with retaining wall, and what you’ll need to do:
- Decide on the location.
- Determine your final height.
- Decide on the shape and size you want.
- Select your materials for the patio surface (concrete, flagstone, pavers, etc).
- Choose your retaining wall materials (interlocking blocks, concrete blocks with veneer, stucco or paint, stacked stone, etc).
- Dig out the shape of the patio perimeter and make sure everything is level.
- Build retaining walls with material choice to the desired height.
- Fill in raised patio with dirt to proper height, then ensure everything is level.
- Lay flagstone or pavers, or pour your concrete for the surface.
- Finish wall surface and caps (if required).
(Actually, first you should review THIS to make sure you’re not paying thousands more than you should!)
See the full Before & Afters HERE!
RAISED STONE PATIO WITH RETAINING WALL:
How to Build a Raised Stone Patio
If you’re wondering how to build a raised stone patio, follow the steps above but stick with all stone materials.
Material #1: Surface stone
To build a raised stone patio, your first job is to select the flagstone surface material for the patio.
Something to keep in mind with a flagstone patio is that it has bigger gaps between the stones and requires sand to even out the surface (like pavers). The gaps will need to be filled either with concrete, or even possibly some low growing groundcover plants. (I envision this like in an old Mediterranean villa where the flagstone patios are so old that meandering, low plants have sprung up here and there, giving it its stunning old-world look!)
Materials #2: Retaining wall stone
To build your stone retaining wall for the patio, you can select either a real stacked stone material or you can build a concrete block wall and cover it with a stone veneer. (This is what we did for our raised stone patio, as the veneer was a fraction of the cost of real stone, but still looked gorgeous!)
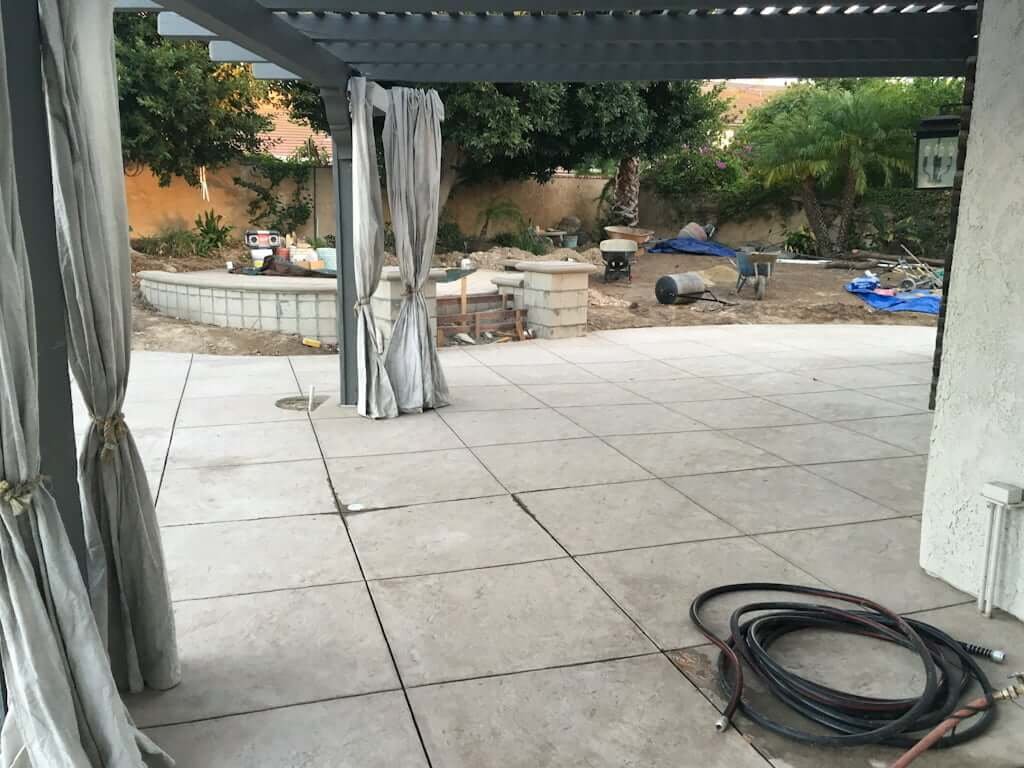
Above you can see not only our raised patio retaining walls in the distance, but the rest of the retaining walls around the pool area that we were doing with all the same style stone veneer.
If you decide to do a real stacked stone, this can be flat flagstone pieces or stacked round stones to your desired height. Either option can use mortar to hold all the stone together for the patio, or can be dry stacked for an even simpler install.
Either way, if you’re doing a backyard reno, you need THIS!
RAISED PATIO EDGING IDEAS
How to Edge a Raised Patio: Our 10 Favorite Edging Ideas!
Building a raised patio with retaining wall requires that you figure out how you’re going to edge it as well. Read our latest post on 10 Tricks for Edging a Raised Patio!
OUTDOOR PATIO DESIGN PICTURES:
Raised Patio Pictures – Before & After!
Sloped Backyard Before:
Sloped Backyard After:
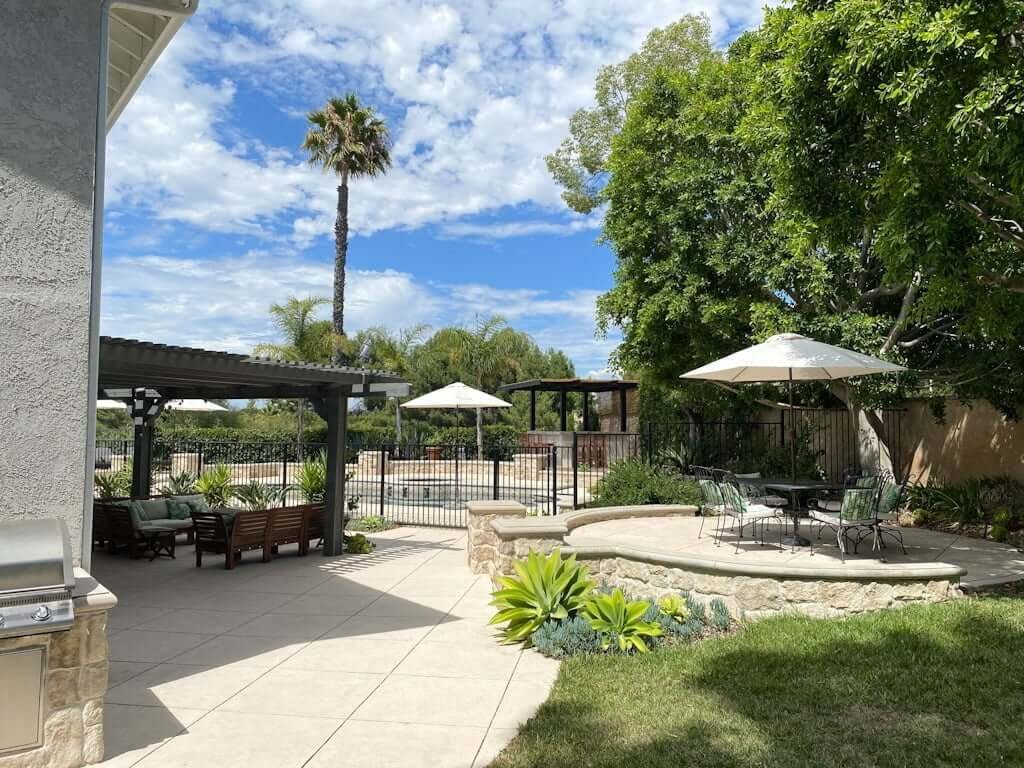
Our new raised patio with retaining wall:

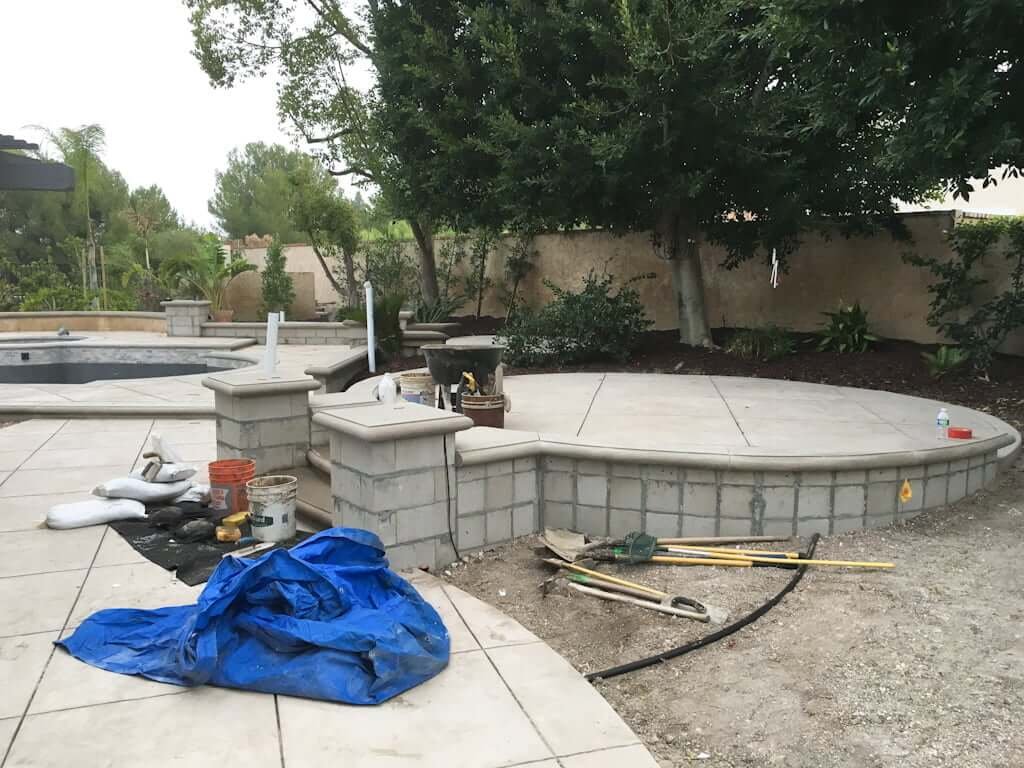
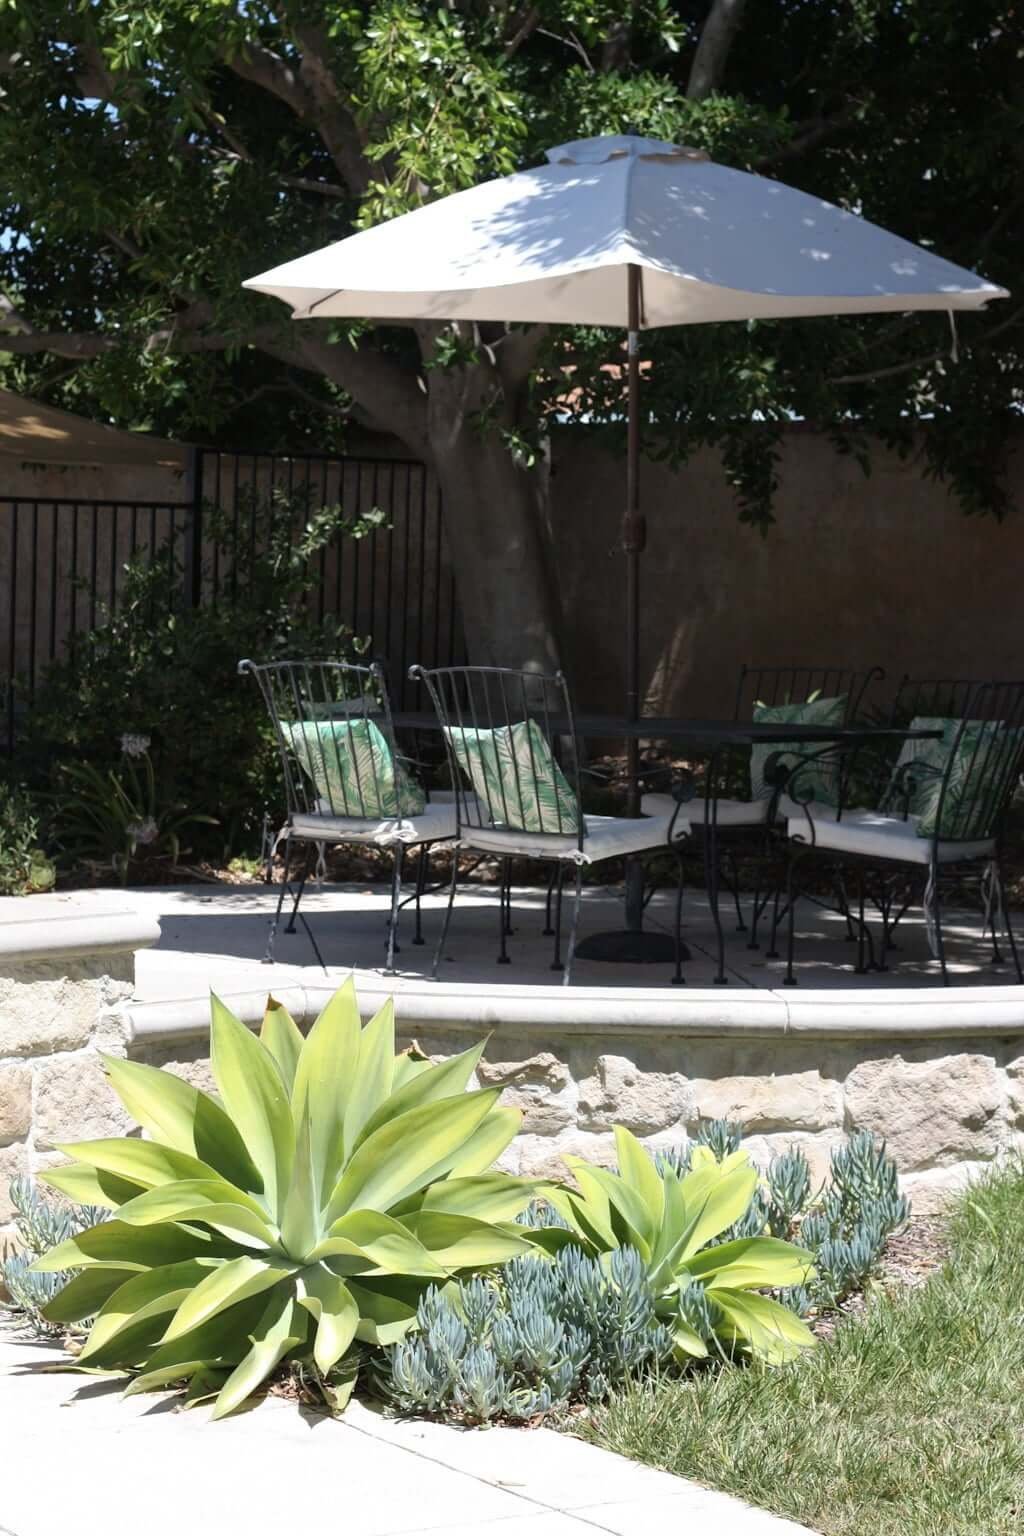
I’ve never shared this before but do you want to know the #1 thing I would do differently in this raised stone patio now? Because it’s on a slope that continues even “behind” the patio, I would have done another stone retaining wall along the back edge to keep the dirt and other debris from falling onto the concrete patio surface. (You can see a little more of this in the below picture, behind the dining table, where there is no retaining wall on that back side.)
RAISED PATIO COST:
How much did it cost to build our raised patio?
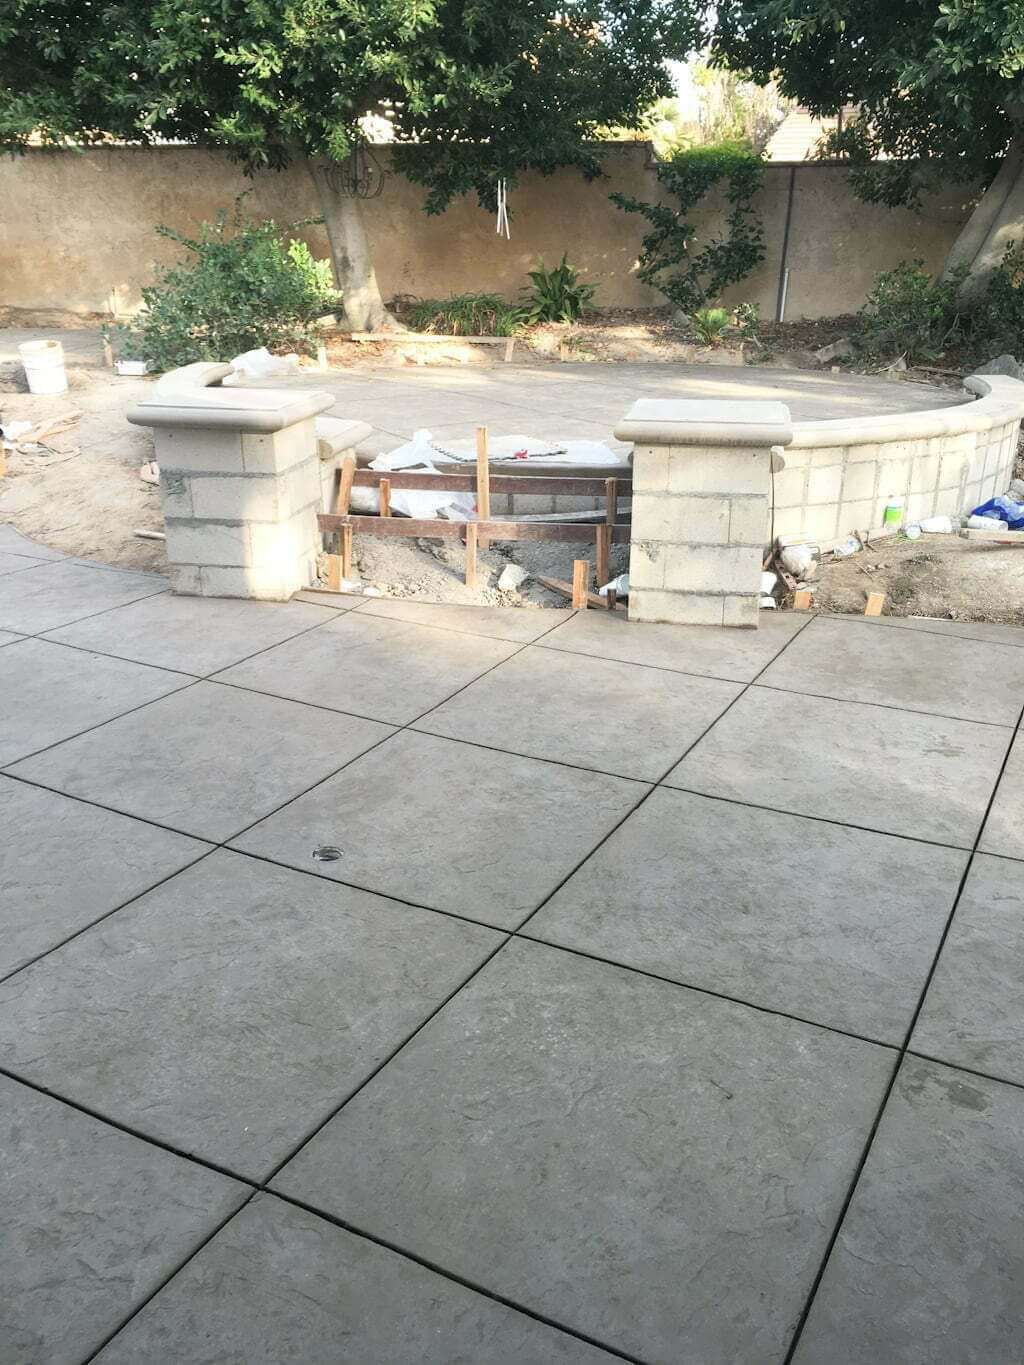
Our large raised patio, which is circular in shape, turned out to be about 250 square feet. It has a partial retaining wall on both sides, as well as two pillars.
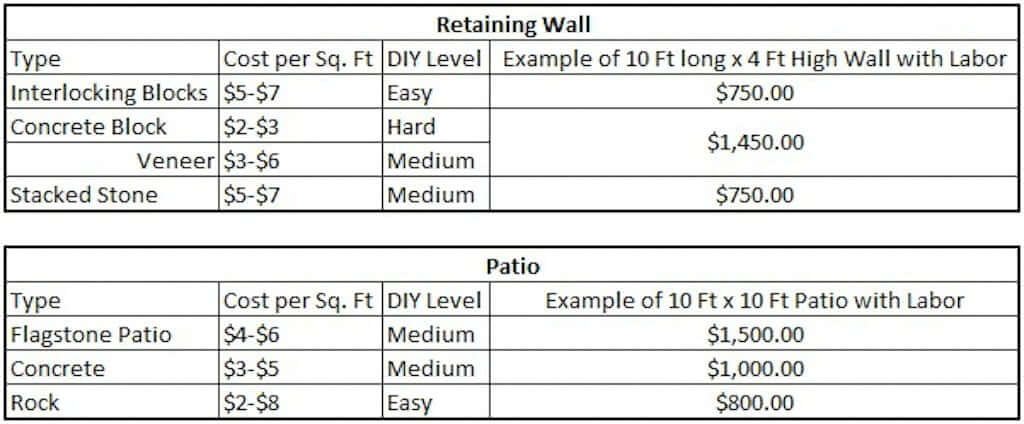
We live in southern California so pricing may be different where you live, but here’s a chart below that Matt put together to give you an idea on material costs (and how they compare!).
In the end, we only spent about $1,200 on materials for the blocks, concrete, and the stone veneer!
Looking for how to calculate the cost of your own raised patio project? This should help!
So glad I married an engineer who enjoys pulling together all these numbers!
See the 15 reasons we built this, as well as our backyard clue to what Armageddon might look like!
Next…
- If you don’t have money growing on trees and you’re doing an outdoor project, you need THIS!👈 (“How To Save Serious Money on Your Backyard Reno!”)
- We’re also sharing our 10 favorite tricks for edging a raised patio!
- You can take the full tour of our backyard. (If you absolutely must skip ahead, you can view our completed backyard makeover.) If you’re feeling really crazy, see how we fit a zipline into our backyard!
- Find what you need in The Complete List of our backyard remodel!
- If you want to streamline your home like we’ve done, we created THIS EASY TOOL to help you do it!
PS: Our complete list of every single home project is viewable HERE.
PPS: If you’d like our help on your own home be sure to check out our Design Guides & Plans or book a Design Consultation with us!


What form did you use for the remaining wall cap? I love it
Hi Rafael! We used a Styro Foam Coping to create the bullnose that is 4”H x 1/75” D like this one. https://www.foamdesigncenter.com/styrofoampoolcopingformck-1.aspx
I would like to build a raised patio, and that is why I’ve decided to start looking for a boulder that may help build the whole place. Thank you for sharing here as well the importance of considering the budget first. I also agree with you that it would be a great idea to balance everything.
Thanks Rachel! Budget and balance are both definitely important in every project! 🙂
My mother would like to have a patio built in her garden area, which is why she has decided to start looking for a concrete contractor. Thank you for sharing here as well the importance of adding more trees around it. It’s a good thing that you clarified here that the concrete is low maintenance too.
So glad it was helpful, Rachel!